SignsHelpEn: Różnice pomiędzy wersjami
| (Nie pokazano 7 wersji utworzonych przez 2 użytkowników) | |||
| Linia 1: | Linia 1: | ||
| + | {{Archiwalne}} | ||
| + | |||
| + | = '''[#signs <font size="28px"><font face="train">Signs</font></font>]''' = | ||
| − | |||
<div id="attachment_226" class="wp-caption alignleft" style="width: 110px">[#sign_eol [[Image:sign_EOL_thumb.png|End of Line]]] | <div id="attachment_226" class="wp-caption alignleft" style="width: 110px">[#sign_eol [[Image:sign_EOL_thumb.png|End of Line]]] | ||
| Linia 97: | Linia 99: | ||
We9 | We9 | ||
| − | + | </div><div style="clear: both"></div> | |
= '''[#signals <font size="28px"><font face="train">Signals</font></font>]''' = | = '''[#signals <font size="28px"><font face="train">Signals</font></font>]''' = | ||
| Linia 103: | Linia 105: | ||
<div style="width: 40%; float: left"> | <div style="width: 40%; float: left"> | ||
| − | == | + | == Semaphore signals == |
<div id="attachment_286" class="wp-caption alignleft" style="width: 110px">[#semaphore [[Image:signal_semaphore_thumb.png|Semaphore]]] | <div id="attachment_286" class="wp-caption alignleft" style="width: 110px">[#semaphore [[Image:signal_semaphore_thumb.png|Semaphore]]] | ||
| Linia 111: | Linia 113: | ||
</div><div id="attachment_298" class="wp-caption alignleft" style="width: 110px">[#distance [[Image:signal_forwarn_thumb.png|Distance Signal]]] | </div><div id="attachment_298" class="wp-caption alignleft" style="width: 110px">[#distance [[Image:signal_forwarn_thumb.png|Distance Signal]]] | ||
| − | + | Distant Signal | |
</div><div id="attachment_302" class="wp-caption alignleft" style="width: 110px">[#shunting [[Image:signal_shunting_thumb.png|Shunting Signal]]] | </div><div id="attachment_302" class="wp-caption alignleft" style="width: 110px">[#shunting [[Image:signal_shunting_thumb.png|Shunting Signal]]] | ||
| Linia 151: | Linia 153: | ||
D0 Sign | D0 Sign | ||
| − | </div> D0 signs are portable signs used to alert a driver that a D1 stop sign is coming up shortly. These are usually placed at the | + | </div> D0 signs are portable signs used to alert a driver that a D1 stop sign is coming up shortly. These are usually placed at the stations stopping distance +200m, before the D1.<br />[#top Back to Top]<div id="sign_d1" class="bump_down" style="clear: both"> |
== D1 Sign == | == D1 Sign == | ||
| Linia 159: | Linia 161: | ||
D1 Sign | D1 Sign | ||
| − | </div> The D1 sign is used in various cases: if there is an obstacle on the tracks; the track is so badly damaged, the driver | + | </div> The D1 sign is used in various cases: if there is an obstacle on the tracks; the track is so badly damaged, the driver can't go faster than 10 km/h; temporary closure of the track; if the upcoming signal is busted etc. These will often be accompanied by rail workers, who will instruct you on what you should be doing. By the time you reach this sign you should be on the verge of stopping.<br />[#top Back to Top]<div id="sign_d6" class="bump_down" style="clear: both"> |
== D6 Sign == | == D6 Sign == | ||
| Linia 179: | Linia 181: | ||
W1 Sign | W1 Sign | ||
| − | </div> The W1 is found with the | + | </div> The W1 is found with the distant signal. It's used to draw extra attention to that signal.<br />[#top Back to Top]</div><div id="sign_w4" class="bump_down" style="clear: both"> |
== W4 Sign == | == W4 Sign == | ||
| Linia 187: | Linia 189: | ||
W4 Sign | W4 Sign | ||
| − | </div> The W4 sign is used to show the end of a | + | </div> The W4 sign is used to show the end of a station's platform. Passenger trains stopping at that platform must come to a halt within 15m of the W4 sign.<br />[#top Back to Top]</div><div id="sign_w5" class="bump_down" style="clear: both"> |
== W5 Sign == | == W5 Sign == | ||
| Linia 195: | Linia 197: | ||
W5 Sign | W5 Sign | ||
| − | </div> The W5 is used to permanently mark the boundaries of the station while shunting. No locomotives are permitted past these signs whilst shunting.<br />[#top Back to Top]</div><div id="sign_w6" class="bump_down" style="clear: both"> | + | </div> The W5 is used to permanently mark the boundaries of the station while shunting. No locomotives are permitted past these signs whilst shunting without a permission.<br />[#top Back to Top]</div><div id="sign_w6" class="bump_down" style="clear: both"> |
== W6 Sign == | == W6 Sign == | ||
| Linia 237: | Linia 239: | ||
<div id="attachment_648" class="wp-caption alignleft" style="width: 110px">[[Image:sign_w11a_4.png|a picture of the W11a with 4 stripes]] | <div id="attachment_648" class="wp-caption alignleft" style="width: 110px">[[Image:sign_w11a_4.png|a picture of the W11a with 4 stripes]] | ||
| − | W11a | + | W11a 4 |
</div><div id="attachment_647" class="wp-caption alignleft" style="width: 110px">[[Image:sign_w11a_3.png|a picture of a W11a sign with 3 stripes]] | </div><div id="attachment_647" class="wp-caption alignleft" style="width: 110px">[[Image:sign_w11a_3.png|a picture of a W11a sign with 3 stripes]] | ||
| − | W11a | + | W11a 3 |
</div><div id="attachment_646" class="wp-caption alignleft" style="width: 110px">[[Image:sign_w11a_2.png|W11a with 2 stripes]] | </div><div id="attachment_646" class="wp-caption alignleft" style="width: 110px">[[Image:sign_w11a_2.png|W11a with 2 stripes]] | ||
| − | W11a | + | W11a 2 |
</div><div id="attachment_645" class="wp-caption alignleft" style="width: 110px">[[Image:sign_w11a_1.png|W11a with 1 stripe]] | </div><div id="attachment_645" class="wp-caption alignleft" style="width: 110px">[[Image:sign_w11a_1.png|W11a with 1 stripe]] | ||
| − | W11a | + | W11a 1 |
</div> W11p signs are used to bring extra attention to approaching level crossings. They are set 200m apart from each other.<br />[#top Back to Top]</div><div id="sign_w11p" class="bump_down" style="clear: both"> | </div> W11p signs are used to bring extra attention to approaching level crossings. They are set 200m apart from each other.<br />[#top Back to Top]</div><div id="sign_w11p" class="bump_down" style="clear: both"> | ||
| Linia 259: | Linia 261: | ||
W11p – 2 | W11p – 2 | ||
| − | </div>[[Image:sign_w11p.png|W11p - 1]] W11a signs are used to bring extra attention to | + | </div>[[Image:sign_w11p.png|W11p - 1]] W11a signs are used to bring extra attention to distant signals which may not be continuously visible for the distance between the [distant signal] and the [#semaphore semaphore], such as with curving tracks. They will always count downward from 4 or 3 stripes.<br />[#top Back to Top]</div><div id="sign_w14" class="bump_down" style="clear: both"> |
== W14 Sign == | == W14 Sign == | ||
| Linia 277: | Linia 279: | ||
<div id="attachment_685" class="wp-caption alignleft" style="width: 210px">[[Image:sign_w15_l.png|W15 - Left]] | <div id="attachment_685" class="wp-caption alignleft" style="width: 210px">[[Image:sign_w15_l.png|W15 - Left]] | ||
| − | W15 | + | W15 Left |
</div><div id="attachment_686" class="wp-caption alignleft" style="width: 210px">[[Image:sign_w15_r.png|W15 - Right]] | </div><div id="attachment_686" class="wp-caption alignleft" style="width: 210px">[[Image:sign_w15_r.png|W15 - Right]] | ||
| − | W15 | + | W15 Right |
</div> The W15 signs are used when signals such as [#semaphore semaphores], are positioned on the wrong side of the track. The arrow points to the signal.<br />[#top Back to Top]</div><div id="sign_w16" class="bump_down" style="clear: both"> | </div> The W15 signs are used when signals such as [#semaphore semaphores], are positioned on the wrong side of the track. The arrow points to the signal.<br />[#top Back to Top]</div><div id="sign_w16" class="bump_down" style="clear: both"> | ||
| Linia 514: | Linia 516: | ||
Common light semaphores | Common light semaphores | ||
| − | |||
| − | |||
| − | |||
| − | |||
| − | |||
| − | |||
Aktualna wersja na dzień 21:21, 28 sty 2021
Spis treści
- 1 [#signs Signs]
- 2 [#signals Signals]
- 3 SIGNS
- 3.1 Z1 Sign
- 3.2 D0 Sign
- 3.3 D1 Sign
- 3.4 D6 Sign
- 3.5 W1 Sign
- 3.6 W4 Sign
- 3.7 W5 Sign
- 3.8 W6 Sign
- 3.9 W8 Sign
- 3.10 W9 Sign
- 3.11 W11a Sign
- 3.12 W11p Sign
- 3.13 W14 Sign
- 3.14 W15 Sign
- 3.15 W16 Sign
- 3.16 W17 Sign
- 3.17 W27 Sign
- 3.18 W28 Sign
- 3.19 We1 Sign
- 3.20 We2 Sign
- 3.21 We3 Sign
- 3.22 We4 Sign
- 3.23 We8 Sign
- 3.24 We9 Sign
- 4 Signals
- 4.1 Mechanical Semaphore
- 4.2 Semaphore SR1 Signal
- 4.3 Semaphore SR2 Signal
- 4.4 Semaphore SR3 Signal
- 4.5 Distance Signal
- 4.6 Distance OT1 Signal
- 4.7 Distance OT2 Signal
- 4.8 Distance OT3 Signal
- 4.9 Shunting Signal
- 4.10 Shunting M1 Signal
- 4.11 Shunting M2 Signal
- 4.12 Light Signals
- 4.13 Stop
- 4.14 Proceed with extreme caution
- 4.15 Light Semaphore Chart
[#signs Signs]
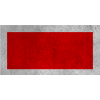
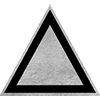
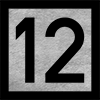
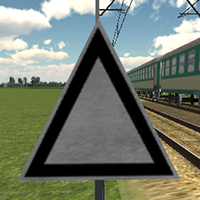
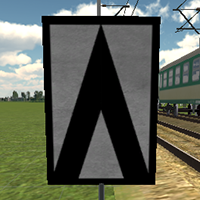
We1
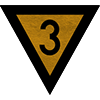
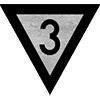
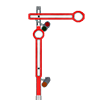
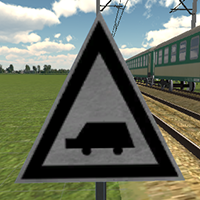
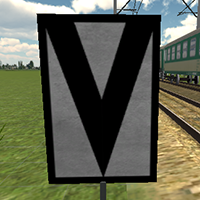
We2
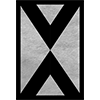
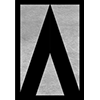
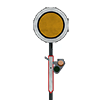
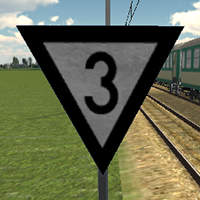
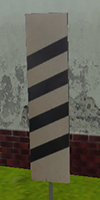
We3
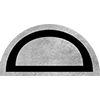
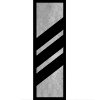
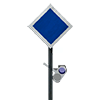
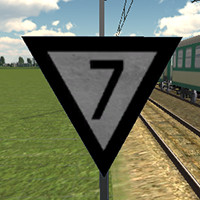
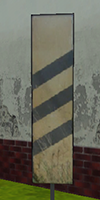
We4
[#signals Signals]
Hand Signals
Coming soon
SIGNS
Z1 Sign
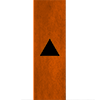
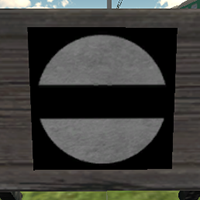
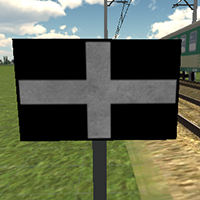
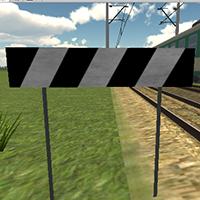
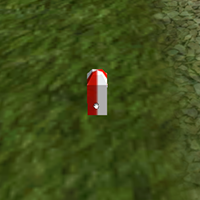
Track closed signs are posted at the very end of the line, attached to buffers where the sidings end. You can also find them near derailers and turntables.[#top Back to Top]
D0 Sign
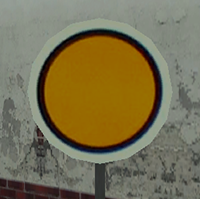
D0 signs are portable signs used to alert a driver that a D1 stop sign is coming up shortly. These are usually placed at the stations stopping distance +200m, before the D1.[#top Back to Top]
D1 Sign
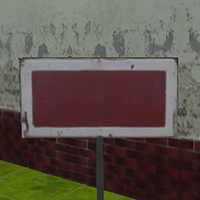
The D1 sign is used in various cases: if there is an obstacle on the tracks; the track is so badly damaged, the driver can't go faster than 10 km/h; temporary closure of the track; if the upcoming signal is busted etc. These will often be accompanied by rail workers, who will instruct you on what you should be doing. By the time you reach this sign you should be on the verge of stopping.[#top Back to Top]
D6 Sign
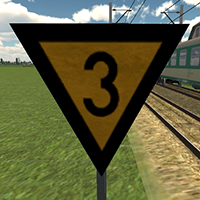
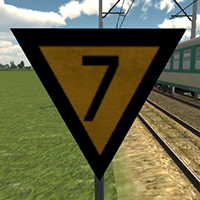
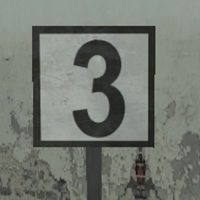
D6 signs are used to inform drivers of an upcoming temporary speed limit, such as when sections of track are undergoing repair. The number is posted in 10s of km/h, so 3 is 30km/h etc. They are paired with the [#sign_w14 W14 signs], which designate the start and end of the reduced speed area. The most common of these you’ll come across are the 30km/h ones.[#top Back to Top]
W1 Sign
The W1 is found with the distant signal. It's used to draw extra attention to that signal.[#top Back to Top]
W4 Sign
The W4 sign is used to show the end of a station's platform. Passenger trains stopping at that platform must come to a halt within 15m of the W4 sign.[#top Back to Top]
W5 Sign
The W5 is used to permanently mark the boundaries of the station while shunting. No locomotives are permitted past these signs whilst shunting without a permission.[#top Back to Top]
W6 Sign
The W6 is a generic sign used when drivers should sound their horns, such as when approaching tunnels. W6 signs with cars on them are specifically for road crossings. All drivers are required to sound their horns when they pass a W6. W6 signs with cars are placed on all types of road crossings (Level crossings get extra signs).[#top Back to Top]
W8 Sign
The W8 signs are used to imform drivers of upcoming permanent speed limited areas. The number is posted in 10s of km/h, so 3 is 30km/h etc. They are paired with, and found at the braking distance before, the [sign_w9 W9 signs], which designate the start and end of the reduced speed area.[#top Back to Top]
W9 Sign
W9 signs are used to mark the beginning and end of permanently speed limited zones. These are always preceeded by a [#sign_w8 W8 sign]. Drivers must be travelling at the speed designated by the [#sign_w8 W8] before reaching the W9. These areas are noted in the Permanent Limits List, and are taken into account when constructing timetables.[#top Back to Top]
W11a Sign
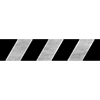
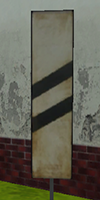
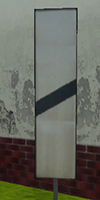
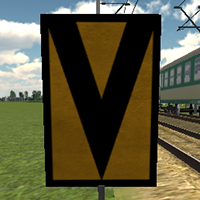
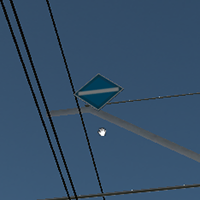
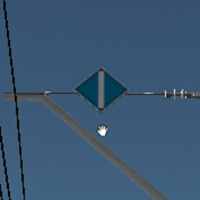
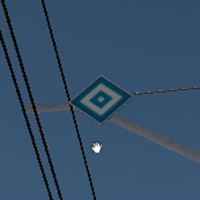
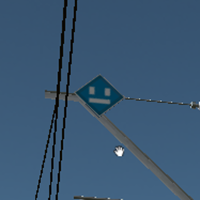
W11p signs are used to bring extra attention to approaching level crossings. They are set 200m apart from each other.[#top Back to Top]
W11p Sign
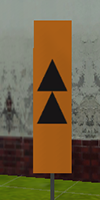
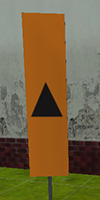 W11a signs are used to bring extra attention to distant signals which may not be continuously visible for the distance between the [distant signal] and the [#semaphore semaphore], such as with curving tracks. They will always count downward from 4 or 3 stripes.
[#top Back to Top]
W14 Sign
W14 signs are used to mark the beginning and end of temporary speed limited zones. These are always preceeded by a [#sign_d6 D6 sign]. Drivers must be travelling at the speed designated by the [#sign_d6 D6] before reaching the W14.[#top Back to Top]
W15 Sign
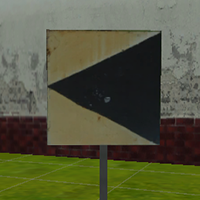
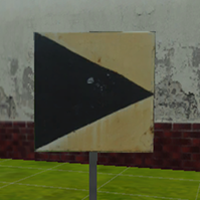
The W15 signs are used when signals such as [#semaphore semaphores], are positioned on the wrong side of the track. The arrow points to the signal.[#top Back to Top]
W16 Sign
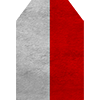
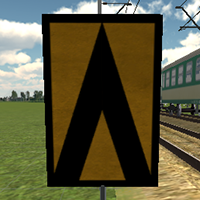
The W16 sign is used to forewarn passenger train drivers of upcoming stations, so they can prepare to stop if they are sheduled to stop there. Note, the W16 can also appear with inverted colours, as seen on the Quick Reference Sheet.[#top Back to Top]
W17 Sign
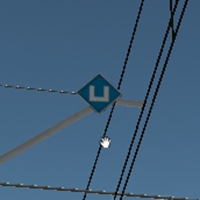
The tiny W17 sign is most often found between two joining tracks. This marks the occupancy boundary, the limit of where trains can go without the risk of colliding with trains on the other track.[#top Back to Top]
W27 Sign
The W27 signs indicate the maximum route speed from that point on. Not to be confused with the [#sign_w8 W8], which controls small sections, the W27 coversa lot more distance.[#top Back to Top]
W28 Sign
The W28 indicates that drivers should which their radio to the designated channel and establish communitcation to the dispatcher in control of that block on that channel. In Train Driver 2, this sign is purely decorative.[#top Back to Top]
We1 Sign
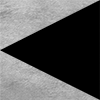
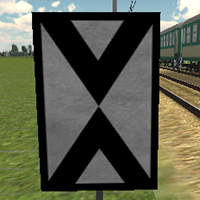
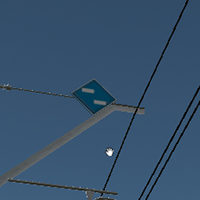
The We1 is attached to the catenary, 500m ahead of the [#sign_we2 We2]. It indicates that drivers should slow down to 60 km/h and prepare to lower the pantographs.[#top Back to Top]
We2 Sign
The We2 is attached to the catenary, and is always preceeded by a [#sign_we1 We1]. Drivers should lower their pantographs. It is used when a section of the catenary is switched off, or if drivers shouldn’t touch the catenary accidentally. It is placed 100m before the point where pantographs should be lowered.[#top Back to Top]
We3 Sign
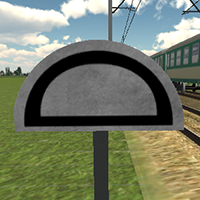
We3 signs are found attched to the catenary, and indicate when drivers can raise their pantographs again. They are usually set 200m after the earliest point pantographs are able to be raised safely.[#top Back to Top]
We4 Sign
We4 signs are attached to the catenary, and indicated that electrical powered stock must not enter. These are placed wherever the catenary ends, or in the case of damage or repairs being performs on the catenary. Drivers of electical powered trains must stop and contact the dispatcher for instructions.[#top Back to Top]
We8 Sign
Attached to the catenary, the We8 is placed 30 before the the boundary of the catenary block. This is where the catenary changes where it gets it’s power from, and you don’t want to draw power from both sources or you’ll fry your locomotive. Drivers should stop drawing power from the catenary by completely releasing the throttle and coasting forward.[#top Back to Top]
We9 Sign
The We9 can be found attached to the catenary 200m after it is safe to begin drawing power again. Drivers can begin drawing power by increasing the throttle.[#top Back to Top]
Signals
Mechanical Semaphore
Semaphore SR1 Signal
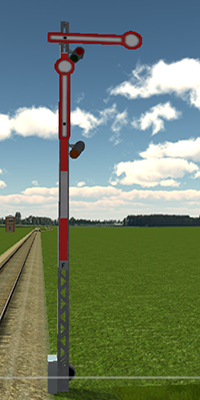
The SR1 indicates there is no clear route ahead and the driver must stop.
Semaphore SR2 Signal
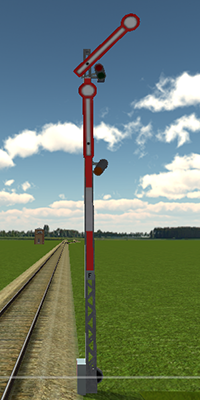
The SR2 signals that the route ahead is clear and the driver can proceed at the maximum speed designated for that route. Also known as a ‘Highball’ signal.
Semaphore SR3 Signal
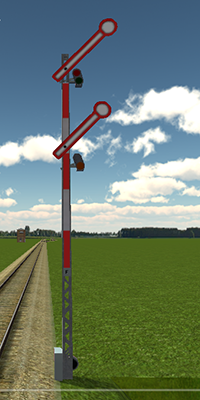
The SR3 is used to signal the route is clear and drivers should proceed at a maximum of 40km/h until they have passed the last switch protected by that semaphore, after which they can travel at the maximum designated speed for that route.
[#top Back to Top]
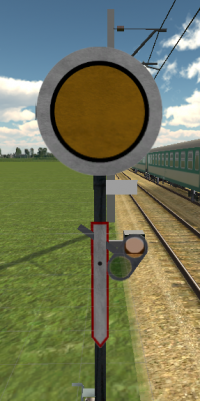
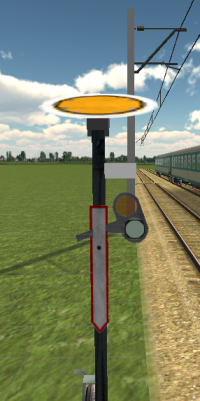
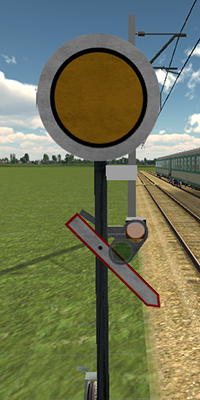
Distance Signal
Distance OT1 Signal
Distance signals are used to forward drivers what the next upcoming [#semaphore Semaphore] will read. The OT1 Signal shows that the next semaphore is showing an SR1 or ‘Stop’ signal. Drivers should slow and prepare to stop.
Distance OT2 Signal
The OT2 Signal shows that the next upcoming [#semaphore semaphore] will be displaying an SR2 or ‘Proceed’ signal, and the driver may continue through at the maximum designated speed for that route.
Distance OT3 Signal
The OT3 Signal shows that the next upcoming [#semaphore semaphore] will be showing an SR3 or a ‘Proceed with speed limit’ signal. Drivers need to slow down and be travelling at a maximum of 40 km/h by the time they reach the paired semaphore.
[#top Back to Top]
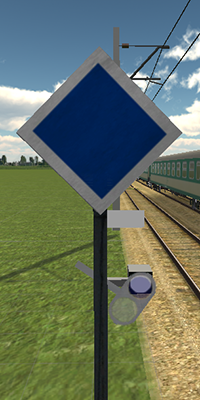
Shunting Signal
Shunting M1 Signal
The M1 Signal is used to show there is no clear route for shunting and shunting is prohibited.
Shunting M2 Signal
The M2 Signal is used to show the route is clear for shunting.
[#top Back to Top]
Light Signals
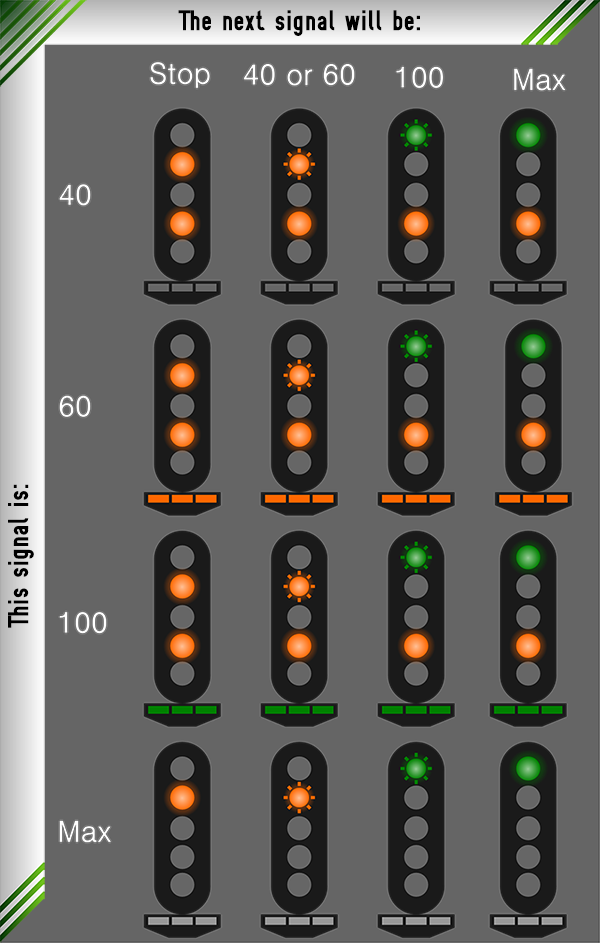
Light based signals can also be used in the place of mechanical semaphores. They have the added advantage if being able to show more information than the mechanical semphores, such as a greater variety and combination of speeds.
The key thing to remember about the light based signals, is that although there are many different configurations of the lights, it’s what is displayed that is important. We’ve chosen the 5-light ones to show the signals on, but could just as easily used, 2, 3, or 4 light signals. It doesn’t matter.
Stop
This one is pretty self explanatory. Drivers should slow down and stop.
[#top Back to Top]
Proceed with extreme caution
In the event of hardware failure, obstruction on the tracks, or even a train crash, and the driver’s safety cannot be guaranteed, the Sz signal is shown. The Sz signal is the single flashing white light. Other lights may be lit alongside it, and if so, those lights are to be ignored. It should only be shown in the most extreme cases. Abuse of this signal has lead to train crashes in the past. Drivers must slow to 40km/h and be prepared to stop.
[#top Back to Top]
Light Semaphore Chart
Again, the total amount of lights on the signal doesn’t matter, only what ones are shown. Below is a chart of all the different semaphore you can come across. They always show two things, what speed you should be going at, and what the next signal will show.
